auto

How to Remove Scratches from Car Paint

Kyle Marra
Kyle Marra 5 Min Read
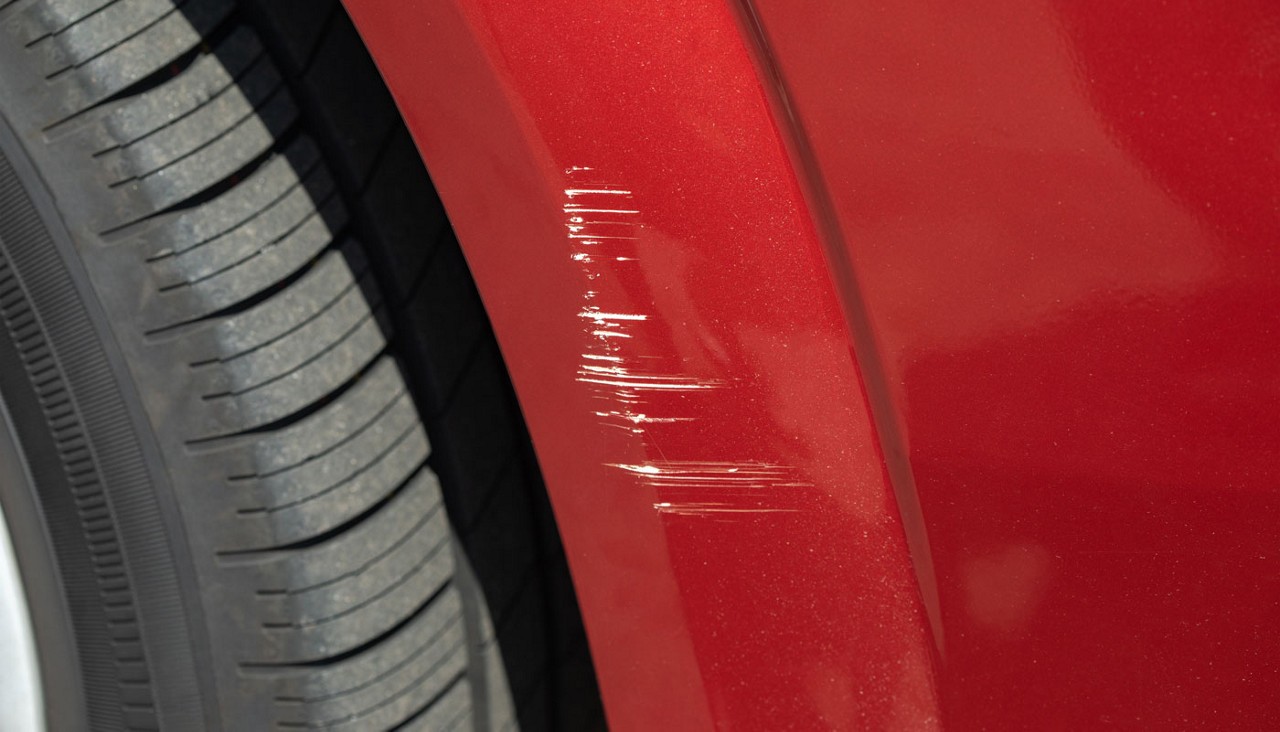
Scratch on the front of the car's wing in a car repair shop.

Picture this: it is a bright summer day; the skies are clear, and you just enjoyed a spectacular beachside sunset after spending a day in the water. Now that the sun has dipped below the horizon, you gather your belongings and return to the parking lot to make the trip home. There is not anything that can bring down your mood…so you think. As you approach your vehicle, you notice something that was not there before. Your heart starts to race as relaxation erupts into frustration. At some point during your beach day, your vehicle’s once pristine paint job was scarred by a long, ugly scratch.

This is just one scenario. Scratches can happen at the grocery store, school or even your own home. Whether it is caused by you or some outside force, it is important to stop, take a deep breath and remember that it is not the end of the world. Though inconvenient, some remedies for restoring your vehicle’s paint to its former glory do not involve a body shop or a possible insurance claim. However, before attempting a fix, you must know what kind of car scratch you are dealing with. 

scratch on a car made by a key

How to determine the severity of a car scratch

The following two tests will help you determine the severity of the scratch or scratches so that you can determine the appropriate course of action:

Visual inspection: Move your vehicle to a well-lit area to assess the damages visually. Viewing the scratches from multiple angles is important when conducting a visual inspection. They may look extremely severe from one direction but not from another. Viewing from multiple angles will give you a more accurate assessment of the scratch’s severity.

Another important element of the visual inspection involves using contrasting colors to make the scratch stand out from the rest of the vehicle. By applying brightly colored tape next to the scratches, you make them more visible, which allows you to get a better idea of depth and severity.

Physical inspection: Run your fingers lightly across the scratches. You will likely deal with light cosmetic scratches if they are fine lines that miss your fingernails. If you can feel them against your fingertips, the scratches may require a more in-depth removal process.

Frustrated woman reviewing scratches on car

Which type of paint scratches have DIY solutions?

Three types of car paint scratches can be remediated with Do It Yourself (DIY) solutions:

Clear Coat Scratch: Clear coat scratches are the easiest to remediate. Clear coat is the shiny finish applied to protect your car’s paint. If the scratch does not pierce anything below this coating, rest assured—it did what it was designed to do.

Tools you will need:

  • A clean, soft towel
  • Detailing clay
  • Car polish
  • A high-quality cloth.

Remove clear coat scratches in five easy steps.

  1. Wash and dry your car. Be sure to use a clean, soft towel to wash and dry. Used towels could have debris clinging to them, further damaging your clear coat.
  2. Remove contaminates with detailing clay to prepare the surface for polishing.
  3. Lightly apply car polish to the affected area(s) with a polishing pad. Be sure to use gentle, circular motions. Repeat this step until scratches fade. Force is unnecessary during the buffing process and could cause more damage to the affected area.
  4. Use finishing polish to refine the paint surface. This will restore your paint’s shine and smoothness.
  5. Apply wax or sealant to restore the clear coat and protect your work.

Paint Scratch: A paint scratch is any scratch that pierces the clear coat and damages your vehicle’s paint. Unlike the clear coat scratch, this requires removing part of the clear coat remediate with a scratch kit.

Tools you will need:

  • Foam applicator
  • Scratch remover (found at most auto parts stores)
  • Wax and a high-quality cloth. 
  • Optional: A buffer or polisher is an optional tool that could be helpful if used with the appropriate amount of force.

Six steps for removing paint scratches.

  1. Wash and dry your vehicle.
  2. Apply scratch remover to the foam applicator as directed.
  3. Clean the area by gently rubbing the scratch remover into the scratch with the foam. Force is not needed and could cause more damage.
  4. Once smooth, take your high-quality cloth and carefully buff the area with some good, old-fashioned elbow grease. If you have a polisher or buffer, you can save yourself some time and energy by using it during this step. Just be sure not to overpower the area or you can cause more harm to your paint than good.
  5. Repeat the above step as needed until the scratch disappears.
  6. Apply wax or polish to ensure your work is covered with a protective coating layer.

Deep Paint Scratch: If the scratch on your vehicle exposes the primer beneath your vehicle’s paint job, then you are dealing with a deep car paint scratch. This is the hardest scratch to repair at the DIY level, but with the right tools, it can be done!

Tools and materials you will need:

  • Sandpaper and sanding tool
  • Polishing pad
  • Masking tape
  • Paper or plastic sheeting
  • Primer
  • Matching paint (can be purchased online or at your local auto parts store)
  • A paint brush with fine bristles (for smaller scratches) or a paint sprayer
  • Wax
  • A high-quality cloth
  • Optional: Buffers or polishers are optional tools that can be used during the polishing process, but they are not required.
A mechanic polishes the surface of a car body.

The process for deep scratches is like the process used to remediate shallow paint scratches.

  1. Thoroughly wash your vehicle to remove contaminants.
  2. Sand the affected area down to the metal. Sandpaper can scratch unaffected areas, so it is important to be mindful of the direction you are sanding.
  3. Prepare your vehicle for the painting process by using masking tape and paper or plastic to shield the rest of the car from paint overspray.
  4. Apply automotive primer to the affected area and wait for it to dry.
  5. Once the primer is dry, it is time to paint. Apply the matching paint with either a paintbrush or sprayer.
  6. Wait for the paint to dry.
  7. Apply polish or clear coat with a microfiber towel to protect your work from getting damaged again.

Important Note: To achieve the best results, practicing this process on a piece of painted metal before working on your vehicle is important. It is a delicate process. Using too much force or rushing it could leave your car looking worse than when you started. However, if time and care are taken, you could save yourself a lot of money.

You might need more than one coat of paint and polish to ensure that the painted section matches the rest of the vehicle.

Car scratch removal: fact from fiction

As you research the various methods for scratch removal and future scratch protection solutions, it is critical to discern fact from fiction. If you are not careful, you could worsen the problem or waste a lot of time performing a remedy that does not produce the desired result. These are some of the common myths and misconceptions to be aware of as you research DIY scratch removal, prevention and car care techniques:

  • Dish soap is suitable for washing your vehicle:  False! Dish soap is designed to remove grease and oils. Using it could weaken or strip away your car’s wax and damage your clear coat, leaving it more susceptible to scratches, paint fading and oxidation.
  • Waxing is only necessary once per year. It only takes a few months for wax to wear off, leaving your vehicle defenseless against scratches, UV rays and other contaminants.
  • There is nothing wrong with washing your vehicle in direct sunlight: Sunlight causes water and soap to dry faster, creating difficult-to-remove water spots. Additionally, the sun’s rays can cause paint expansion, making your vehicle vulnerable to scratches during the wash.
  • Toothpaste is the perfect DIY scratch remover: This one is partially true. For minor clear coat scratches, toothpaste's abrasive properties may help reduce the visibility of smaller scratches. However, it can do more harm than good to deeper ones and should NOT be used in place of professional polishing compounds. Always test an area of your car not visible to determine if this method will work for you.
  • WD-40 should never be used on a vehicle’s exterior: WD-40 is often hailed as a go-to solution, much like duct tape or Velcro, for tackling everyday challenges. However, it’s designed for specific purposes. Using it to repair scratches or to enhance water resistance can lead to unintended consequences and potentially create bigger problems.
  • Vinegar is an effective car cleaning solution: While vinegar is a common household cleaner, it is not wise to use it to clean your entire vehicle’s exterior. Vinegar is acidic by nature, and it will deteriorate your clear coat and paint over time. If you do choose to use it, do not use it in direct sunlight, and be sure to heavily dilute it with water to reduce the potential for paint damage. While not best for paint, properly diluted vinegar works great on glass and wheels.
  • Car covers are essential for protecting your vehicle in all conditions: Again, there is partial truth to this. A clean, fitted car cover can make a world of difference. If you allow your cover to get dirty and do not remove contaminates as they build, or you use a cover that does not fit your vehicle, it could scratch your vehicle during the covering and uncovering process.
  • Waterless wash products should NEVER be used: Contrary to popular belief, waterless products will NOT cause you to scratch your vehicle; there is nothing wrong with using them if utilized correctly. They are perfect for removing thin layers of dust but are not useful if your car is coated in a thick layer of dirt. It is important to use a microfiber towel

Discovering fresh scratches on your vehicle can be frustrating. However, knowing how to deal with them appropriately will help put your mind at ease and potentially save you a lot of money. By utilizing the above inspection techniques and choosing the appropriate remediation process, your vehicle will be back on the road looking as clean and sleek as it did before.

Scratch repair

Need help beyond DIY? We've got you covered!

AAA Members save 10% off the retail price of most parts and accessories at participating NAPA Auto Parts Stores. Show your membership card at checkout.

Save today